Your first world
A walkthrough from an empty worlds list to an exported image, using the real buttons in order, with what each heavy step costs.
This gets you from launch to a file on disk. It uses the import path, because that reaches a picture fastest and needs no GPU. Where a step has depth behind it, there is a link out rather than a detour.
You need a greyscale heightmap as PNG or JPEG. Anything works: a render from another tool, a scan of a pencil sketch, a height field you already own.
1. Start a world#
Click New world in the worlds picker. The setup wizard opens.
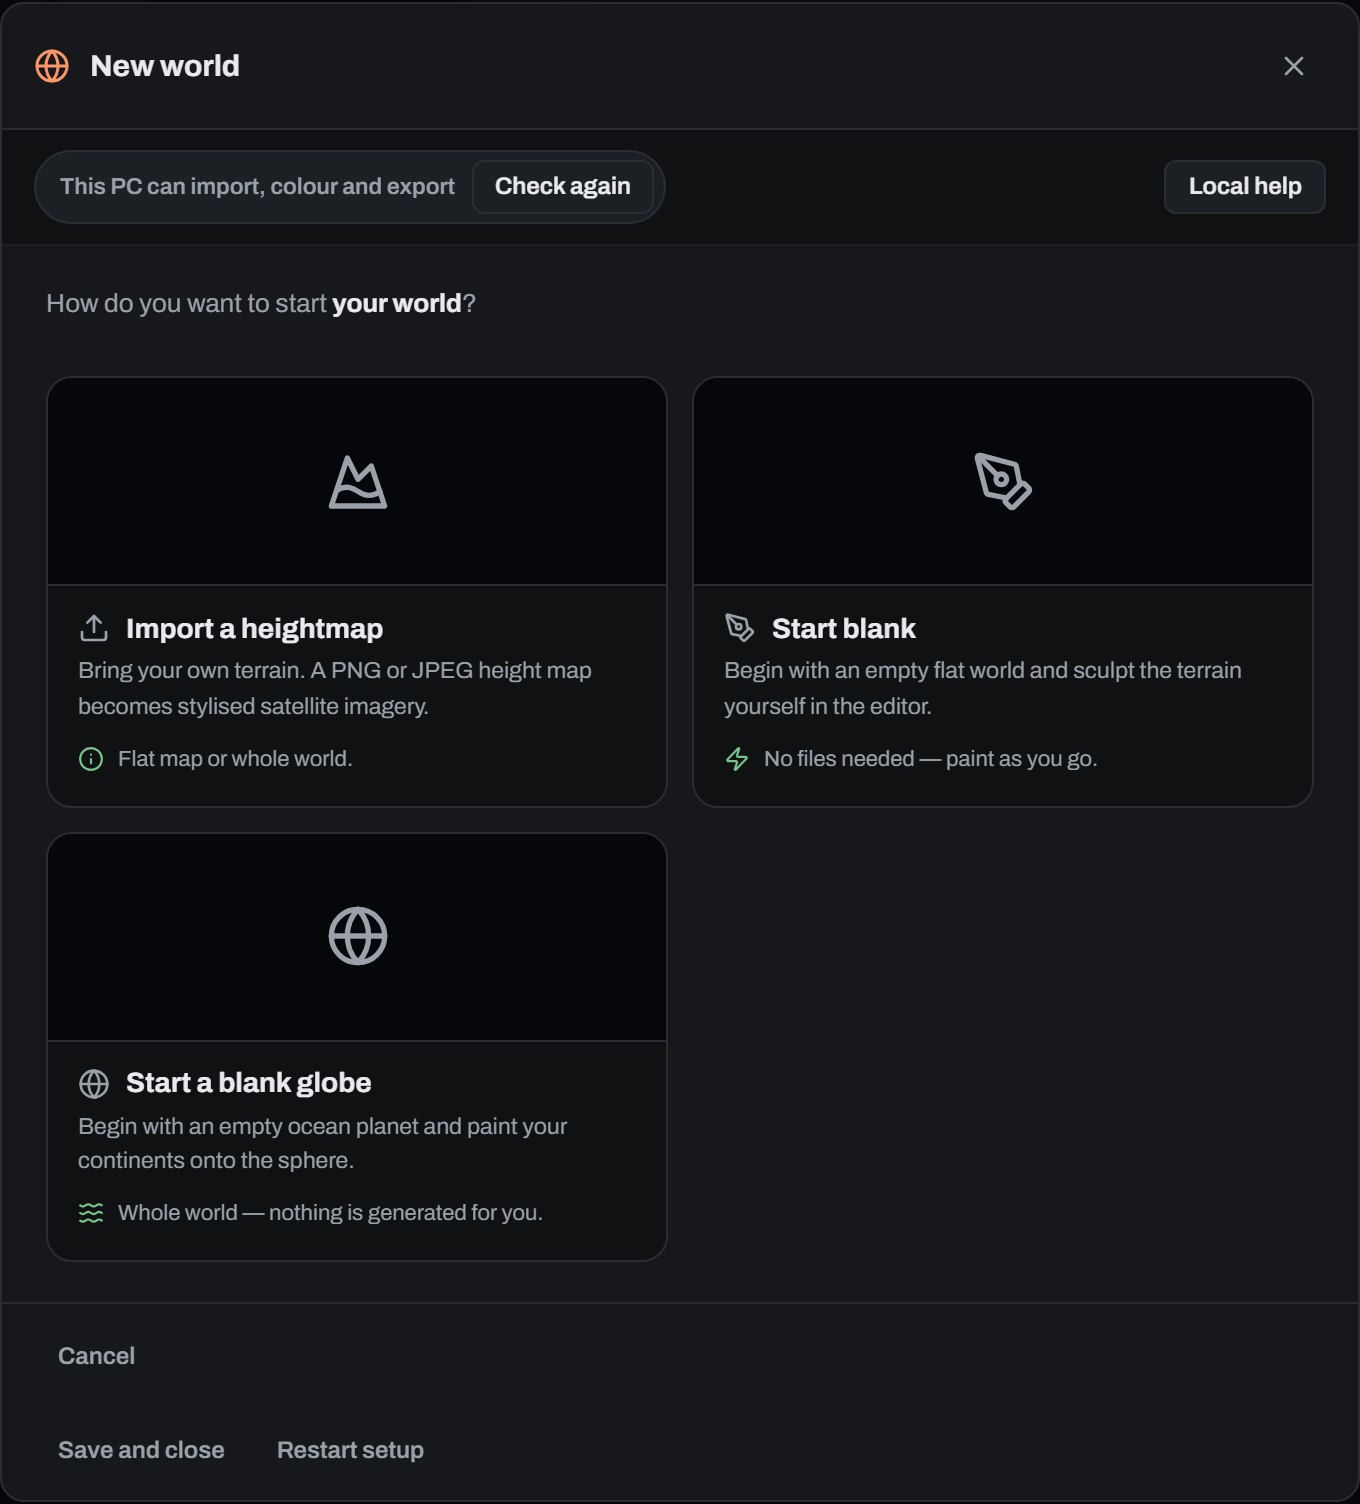
On the first pane, How do you want to start your world?, choose Import a heightmap.
2. Choose the shape#
The Shape step asks whether this is a flat map or a whole world. This is the only choice that changes the workflow, and changing it later discards your imported map.
Pick A flat map for now. One rectangle, no reprojection, straight into the editor. It sets the default map width to 200 km. A whole world instead gives you a globe you carve regions off, and defaults to a 40 000 km circumference.
3. Set the scale and drop the file#
On the Map step, fill in three things and drop your image.
- Project name, which starts as
My project. - Map width (km). How wide the whole image is on the ground. 1 to 100 000.
- Height at white (m), default 4000. The land elevation pure white means.
Then drag your heightmap onto Drop your heightmap here, or click it to open a file picker. The app reads the file, shows its dimensions and bit depth, and stamps a verified hash under it. The drop zone stays disabled until the scale fields are valid, so fill those in first.
Leave Climate and biome source on Decide for me. That derives biomes from the heightmap and needs no extra files. Rainfall is optional and can stay off; without it, rivers use uniform runoff.
Get the width right. Every brush, every river, every snow line and every landform stamp in the app is denominated in real ground units, so the map width is what makes them mean anything.
4. Set the waterline#
The Sea & terrain step shows a preview with the sea painted in and tells you what percentage of the map falls below the proposed waterline.
- Waterline, 0 to 1 in steps of 0.005, starts at whatever the engine proposed from your image.
- Coastline softness, 0 to 1, default 0.5.
- Deep-ocean floor defaults to No depth in my maps, with Synthetic sea floor on Auto. That synthesises a shelf, slope and abyss under your ocean. A flat ocean reads to the terrain model as flat land, so leave this on unless your heightmap genuinely encodes depth.
If you have a land mask or a climate map at the same size, Set sea level from a land mask reads the exact waterline from it instead of guessing.
Click Keep it.
5. Build it#
The Build step summarises what you chose. Click Create & render.
Creation runs on the engine and reports its state live. When it finishes, the wizard closes and the section editor opens with your terrain loaded.
6. Take the first render#
The canvas opens with a NO ACQUISITION YET pill and an Acquire button. Click Acquire.
The render is progressive: a 512 px pass, then 1024, then 2048, each one replacing the frame on the canvas. The composition is readable within seconds and the detail arrives as the ladder climbs. Flow routing costs about 1.5 to 2.3 seconds at the default 4096 px analysis grid, and the very first render on a new machine also pays a one-off compile of about 1.3 seconds that is then cached to disk.
When it lands, the canvas chip reads ACQUIRED with a timestamp and the pixel size.
7. Art-direct the image#
The Controls panel on the right is where the look is set. Open the groups that matter to your scene:
- Rivers, including the Lakes and Water colour sub-groups.
- Sea, for shallow tint, deep cutoff and deep water colour.
- Snow & ice, for the snow line in degC and its coverage.
- Global look, for Relief, Relief shading, Texture detail and Seed.
Every edit marks the preview stale. The canvas shows PREVIEW STALE with a count of what changed, and the button becomes Re-render. Nothing renders until you ask, which is what keeps the sliders usable. Use Compare in the header to hold the previous frame against the current one.
Full reference for every control lives on the render pages.
8. Optional: generate real terrain#
If your heightmap is a rough blocking rather than finished ground, this is the step that makes it real. It needs an NVIDIA GPU.
Click Generate in the header. Leave the model on 90 m for a continental section; 30 m is for playable ground and wants more VRAM. The Sketch preset is the default and is right for a blocked-in map; the Faithful cards are for real or precise heightmaps. The control worth understanding is Elevation SNR, default 0.20: lower values stick closer to the terrain you drew, though only above the model's cell scale; the finest detail is always the model's own invention.
Progress creeps toward 85 % during the opaque part of the run, which is the sidecar reporting elapsed time rather than real work.
When it finishes, a colour render starts on its own so you can see the new ground, and Revert to authored heightmap stays available if you want your original back.
Set the sea level before you generate, not after. Moving it afterwards reclassifies land and ocean the model authored.
See Painting terrain if you would rather draw the terrain than import it.
9. Pick the output resolution#
In the header, Output sets the final resolution for heightmap and colour exports: Native, 2K, 4K, 8K, 16K or 32K. It starts on Native and is remembered per section.
4K is a sensible first export. A section export is rejected above 16 384 px; only a globe export goes to 32 768 px.
10. Export#
Click Export in the header. The dialog opens on the Files destination, which ticks everything available; Blender, Unreal and Tabletop preset smaller layer sets.
Useful layers for a first run:
- Satellite colour, the render itself.
- Heightmap, 16-bit PNG plus a metres decode sidecar.
- Land heightmap, the same encode with the sea clamped to 0 m, which is what you want for Blender displacement.
- Water mask, rivers, lakes and sea in one grey mask, useful as a roughness driver.
Set an output folder or leave the default, which is a timestamped folder under loresat_exports beside the world. Click Acquire.
The job runs in the background and lands in the Acquisitions drawer, reachable from the header. Every layer is written at one matched target size, so the colour and every mask line up pixel for pixel. Cost tracks the resolution you chose: the satellite layer carries eight times the weight of a mask re-encode, and at 16K the hillshade pass alone runs about 5 seconds.
When it completes, the receipt lists every file with its dimensions and a Copy file path button. If you exported a heightmap, the receipt also shows a Set in Gaea panel with the map size, height and sea-level brightness to type into Gaea or Wilbur. The same numbers are written to handoff.txt in the export folder.
That is a finished image on disk.
If you started a whole world#
The globe workspace sits in front of the section editor rather than replacing it.
- Draw a region on the sphere with the Box or Lasso tool.
- Name it in the composer and click Create region. Advanced controls hold Output long side, default 2048 px.
- Open the region and run steps 6 to 10 above inside it. The pipeline strip on each region card tracks where it has got to: Rough terrain, Terrain detail, Analytic colour, Learned enhance.
- Back on the globe, Re-compose globe folds finished regions and tile edits into the sphere.
- Export globe ships the whole planet, up to 32 768 px on the long side.
Enhance world runs the terrain model or the colour pass over the entire planet. It processes every tile and can take many hours, so get one section looking the way you want before you start it.